
What is a Kneaded Eraser?
What is a Kneaded Eraser?
Support us by using our links. We may earn a commission, but it won’t cost you extra. Win-win shopping
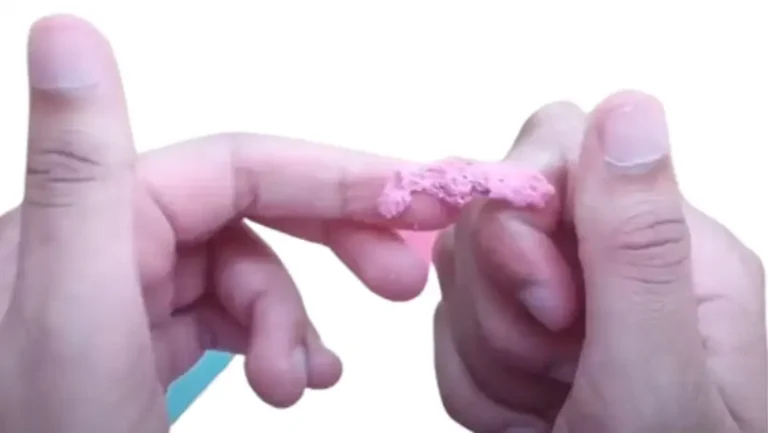
A kneaded eraser,(also known as putty rubber), is a versatile artist’s tool perfect for precise erasing, shaping, and highlighting in graphite, charcoal, pastel, and chalk. Unlike regular erasers, kneaded erasers are pliable and can be molded.
Its flexibility allows us to shape and mold the eraser according to our specific needs, making it ideal for intricate drawings that demand finesse and accuracy.
They’re great for removing light marks and detail work. However, they may not fully erase dark areas.
One of the standout features of kneaded erasers is their incredible blending and smudging capabilities.
By kneading the eraser and molding it into different shapes, we can effortlessly create smooth transitions and gradients, giving our artwork a realistic and professional finish.
What Are Kneaded Erasers Made Of?
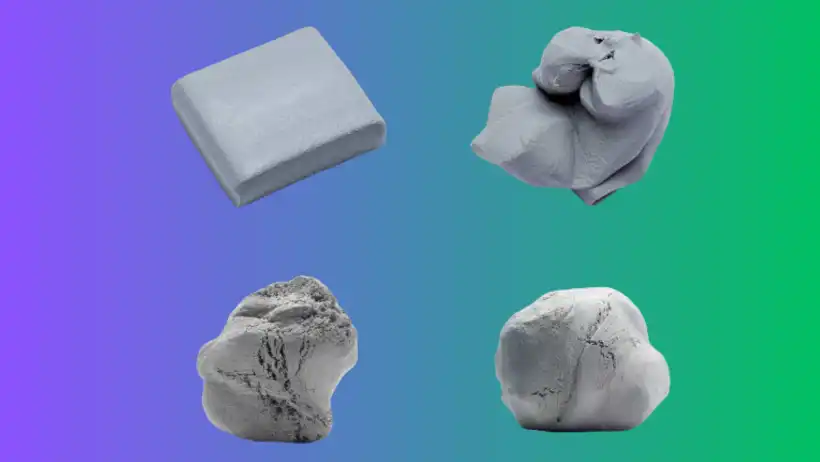
Kneaded erasers are made of a soft, pliable material known as unvulcanized rubber. This material provides the eraser with its unique properties, allowing it to be shaped and molded according to the artist’s needs.
The softness of the rubber ensures that the eraser is gentle on paper, preventing any damage or tearing while erasing.
kneaded erasers are commonly found in gray or white colors, although they can also be found in various other colors such as blue, green, or pink. These different color options not only add a touch of creativity to an artist’s toolkit but also help in distinguishing between different erasers or uses.
| Properties | Material |
|---|---|
| Softness | Unvulcanized rubber |
| Color | Gray, white, blue, green, pink |
| Additional Features | Scented options available |
Some kneaded erasers such as Raymond Geddes come in scented variations, offering a pleasant drawing experience. These scented erasers can be found with flavors like vanilla or lavender, adding a delightful touch to the artistic process.
The Benefits of Using a Kneaded Eraser
Using a kneaded eraser offers several advantages to artists.
allows for precision erasing
making it easy to remove small mistakes or unwanted marks without damaging the surrounding artwork. This is particularly useful when working on intricate drawings that require precision and delicate touch.
With a kneaded eraser, I can easily target specific areas and remove graphite, charcoal, or pastel marks with accuracy.
kneaded eraser doubles as a blending tool
This enables me to create smooth transitions and gradients in my artwork. By shaping the eraser into a point or a flat disc, I can gently smudge and soften the drawing medium, giving my artwork a more realistic and polished appearance.
It’s a versatile tool that allows me to achieve different blending effects depending on the desired outcome.
kneaded eraser leaves no residue behind
This is crucial for maintaining a clean and professional-looking piece. Unlike traditional erasers that can leave smudges or debris, a kneaded eraser ensures that my artwork stays pristine. It’s reassuring to know that my hard work won’t be compromised by unwanted marks or residue left behind by the eraser.
kneaded eraser are reusable
Unlike conventional erasers that wear down and need frequent replacement, a kneaded eraser can be easily cleaned by kneading and manipulating it to remove any pigment or debris. This not only saves money in the long run but also reduces waste, making it an environmentally-friendly choice.
Benefits of Using a Kneaded Eraser
| Kneaded Eraser Benefits | Explanation |
|---|---|
| Precision Erasing | Allows for targeted removal of small mistakes or unwanted marks |
| Blending Tool | Enables smooth transitions and gradients in artwork |
| No Residue | Leaves behind no smudges or debris |
How to Use a Kneaded Eraser
Using a kneaded eraser is a simple and effective way to correct mistakes, blend, and smudge in your artwork. Here are some step-by-step instructions on how to use a kneaded eraser:
Step 1: Soften the Eraser
Begin by kneading and manipulating the eraser with your fingers until it becomes soft and pliable. This will make it easier to shape and mold the eraser to fit your specific needs.
Step 2: Erasing
When erasing, gently press the kneaded eraser onto the area you want to remove or lighten. Avoid pressing too hard or scrubbing the paper, as this can damage the surface. Instead, use a light touch and lift the eraser away after each stroke. This will help to prevent any unwanted marks or indentations.
Step 3: Blending and Smudging
To blend or smudge, shape the kneaded eraser into a point or a flat disc, depending on the desired effect. Use a light touch and gently glide the eraser over the areas you want to blend, gradually building up the desired effect.
This technique is particularly useful for creating smooth transitions and gradients in your drawings.
| Tip | Technique |
|---|---|
| 1. | Experiment with different shapes and sizes of kneaded erasers to create different effects. |
| 2. | For precise erasing, shape the eraser into a point or a thin edge. |
| 3. | For blending and smudging, flatten the eraser into a disc or roll it into a cylinder. |
| 4. |
Try using the kneaded eraser in combination with other erasers or blending tools for different effects. |
You can read our comprehensive guide on How To Use A Kneaded Eraser Like A Pro
Choosing the Right Kneaded Eraser for Your Artwork
When it comes to selecting a kneaded eraser for your artwork, it’s important to consider the specific needs of your project. Different types of kneaded erasers offer unique characteristics that can enhance your artistic process.
Here are some factors to consider when making your choice:
1. Softness and Pliability:
Kneaded erasers come in a range of softness levels. Softer erasers are more pliable and ideal for delicate drawings that require fine erasing and blending. Firmer erasers provide more control and are suitable for larger areas or heavier erasing.
2. Size
The size of the eraser can impact your comfort while working and the area it covers. Larger erasers may be easier to hold and provide a larger surface area for blending or erasing.
3. Artistic Medium
Consider the medium you’ll be working with. Some erasers are designed specifically for graphite, charcoal, or pastel, while others are versatile for use with multiple mediums. Choosing an eraser that aligns with your medium can optimize its performance.
4. Personal Preference
Ultimately, the best kneaded eraser for your artwork will depend on your personal preference. Take the time to experiment with different erasers and find the one that feels comfortable in your hand and aligns with your artistic style.
| Kneaded Eraser Type | Softness Level | Recommended Mediums |
|---|---|---|
| Soft Kneaded Eraser | Very Soft | Pastel, Charcoal |
| Medium Kneaded Eraser | Soft to Medium | Graphite, Charcoal, Pastel |
| Firm Kneaded Eraser | Medium to Firm | Graphite |
Caring for Your Kneaded Eraser
Properly caring for your kneaded eraser is essential to prolonging its lifespan and maintaining its effectiveness. Here are some tips on how to care for your kneaded eraser:
- Cleaning: clean your eraser, simply knead it and manipulate it to remove any accumulated pigment or debris. You can also lightly stretch the eraser or roll it between your fingers to remove embedded particles. Avoid using water or solvents, as this can alter the texture and reduce its effectiveness.
- Storage: When not in use, store your kneaded eraser in a clean and dry container or wrap it in plastic or wax paper. This will help prevent it from picking up dirt or dust. Avoid exposing your eraser to extreme temperatures or direct sunlight, as this can cause it to become brittle or lose its elasticity.
Additional Tips:
- Periodically knead and stretch the eraser to remove any accumulated pigment or debris.
- Experiment with different shapes and sizes of kneaded erasers to find what works best for your needs.
- Avoid pressing too hard when using the eraser, as this can damage the paper.
Remember, a well-cared-for kneaded eraser can be a valuable tool in your artistic arsenal, providing precision erasing, blending abilities, and versatility.
How Long Do Kneaded Erasers Last?
Kneaded erasers are known for their versatility and effectiveness in the world of art. But how long can you expect your kneaded eraser to last? The lifespan of a kneaded eraser depends on several factors, including frequency of use and proper maintenance.
With regular cleaning and storage in a cool, dark place, a kneaded eraser can maintain its softness and pliability for an extended period of time. This means that with proper care, your kneaded eraser can last for several years, making it a cost-effective choice for artists.
Proper Care and Maintenance for Longevity
To ensure that your kneaded eraser lasts as long as possible, it’s important to follow these care and maintenance tips:
- Store your kneaded eraser in a container with a lid or wrap it in plastic wrap to prevent drying out.
- Avoid exposing your kneaded eraser to extreme temperatures, direct sunlight, or heat sources.
- Regularly knead the eraser between your hands to remove any dried-out bits and maintain its softness.
- Clean your kneaded eraser with a soft brush or cloth to remove any debris or marks.
| Factors | Impact on Longevity |
|---|---|
| Frequent use | May shorten lifespan |
| Proper cleaning and storage | Can extend lifespan |
| Regular kneading | Helps maintain softness and pliability |
How to Keep Your Kneaded Eraser Soft
Proper care and maintenance are essential for keeping your kneaded eraser soft and pliable. By following a few simple techniques, you can ensure that your eraser remains in optimal condition for your charcoal drawings and other artistic endeavors.
Storage and cleanliness
Storing your kneaded eraser correctly is the first step towards maintaining its softness. Keep it in a container with a lid or wrap it in plastic wrap to prevent it from drying out.
This will help preserve the eraser’s moisture and pliability. It’s also crucial to store the eraser in a cool, dark place, away from direct sunlight or sources of heat that can cause it to harden.
In addition to proper storage, regular cleaning is necessary to remove any debris or dried-out bits from the eraser. Gently knead the eraser between your hands to freshen it up and restore its softness.
You can also use a soft brush or cloth to lightly clean the eraser’s surface, ensuring it remains free from dirt and marks.
Techniques for maintaining softness
If you notice that your kneaded eraser is starting to dry out or lose its pliability, there are techniques you can employ to revive it. One method is to knead and roll the eraser between your hands. The heat generated from this action will soften the eraser and make it more malleable again.
Another technique is to place the eraser in a container with a warm, damp cloth. The moisture from the cloth will seep into the eraser, restoring its softness.
Remember to avoid using excessive force or applying heat directly to the eraser, as this can damage its texture and effectiveness. Gentle kneading and gradual rehydration are the key to keeping your kneaded eraser soft and ready for your artistic pursuits.
| Storage Tips | Cleaning Techniques | Reviving a Dry Eraser |
|---|---|---|
| – Store in a container with a lid – Wrap in plastic wrap | – Gently knead between hands – Clean with a soft brush or cloth | – Knead and roll between hands – Place with warm, damp cloth |
| – Keep in a cool, dark place | ||
| – Avoid exposure to direct sunlight or heat |
How to Revive a Dry Kneaded Eraser
As an artist, you may encounter a situation where your kneaded eraser has dried out and become hard. But fear not, there are several techniques you can employ to revive your eraser and bring it back to its soft and pliable state.
Kneading and Rolling
One method to revive a dry kneaded eraser is by kneading and rolling it between your hands. The heat generated from the friction will help soften the eraser and make it more malleable. Simply apply pressure and roll the eraser back and forth between your palms until it becomes flexible again. This technique is effective in restoring the eraser’s original texture.
Moisture Method
Another approach is to use moisture to rejuvenate the eraser. Place the dried-out eraser in a container with a warm, damp cloth or paper towel. The moisture will gradually seep into the eraser, making it softer.
Make sure not to soak it or expose it to excessive humidity, as it may damage the eraser. Monitor the eraser periodically and remove it from the container once it has regained its pliability.
Using a Hairdryer
If you’re in a hurry and need to revive your dry kneaded eraser quickly, a hairdryer can come to the rescue. Set the hairdryer to a low or medium heat setting and gently warm the eraser.
As the heat is applied, the eraser will begin to soften. Be cautious not to overheat it, as this can cause the eraser to become too sticky or even melt. Allow the eraser to cool down before using it.
| Revival Technique | Procedure |
|---|---|
| Kneading and Rolling | Knead and roll the eraser between your hands to generate heat and restore its flexibility. |
| Moisture Method | Place the eraser in a container with a warm, damp cloth or paper towel to allow moisture to seep in and soften the eraser. |
| Using a Hairdryer | Gently warm the eraser with a hairdryer set to low or medium heat, being careful not to overheat it. |
conclusion
A kneaded eraser, favored by artists, is a versatile tool. It removes graphite, charcoal, and pastel marks effectively. Its pliable nature lets artists shape it as needed.
These erasers are gentle on paper, residue-free, and easily manipulated for diverse tasks. Their uniqueness makes them perfect for blending, smudging, and precision erasing in intricate artwork.
In conclusion, a kneaded eraser offers precision, blending, and versatility to enhance art. Understanding how to use and care for it unlocks artistic potential.