
How to Use a Kneaded Eraser Like a Pro
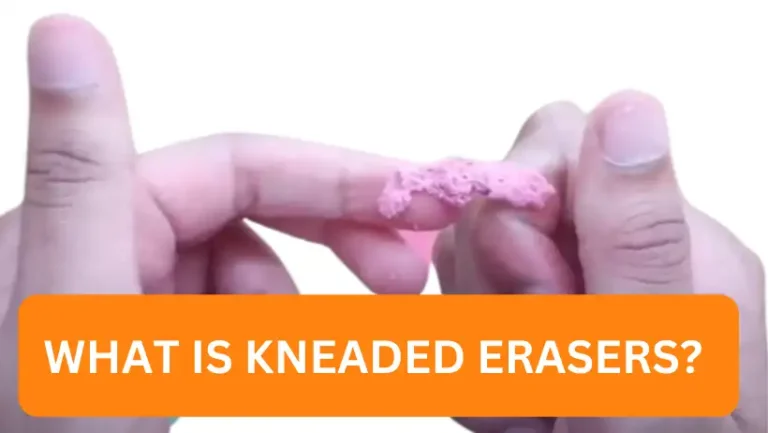
Imagine effortlessly blending and shading, knowing you have complete control over your art. A kneaded eraser (also known as putty rubber), often overlooked, holds the key to turning your sketches into masterpieces.
With years of experience in graphite and charcoal pencil work, I’ll help yo know:
- Why Use a Kneaded Eraser
- How to Use a Kneaded Eraser
- The benefits of using a kneaded eraser over traditional erasers
- Master the art of erasing and highlighting with a kneaded eraser
- How to clean and maintain your kneaded eraser
- Factors when choosing the right kneaded eraser for your needs
Whether you’re a beginner looking to fix minor errors or an advanced artist perfecting highlights, this article will provide you with essential knowledge and practical tips. Are you ready to harness the power of this remarkable tool?
Are you ready to know How to Use a Kneaded Eraser?
Let’s find out together!
Why Use a Kneaded Eraser?
When it comes to drawing and artistic techniques, using a kneaded eraser can be a game-changer. This versatile tool offers several advantages over traditional rubber or vinyl erasers.
One of the key benefits is that it leaves behind no residue or eraser bits on the paper, ensuring clean and precise erasing. This is particularly important for artists who want to maintain the integrity of their artwork without any unwanted marks or smudges.
Another reason why artists love using kneaded erasers is the unparalleled control they provide. Unlike regular erasers, kneaded erasers can be molded into different shapes, allowing artists to erase or highlight specific areas with precision.

Whether you need to remove small details or create subtle shading and blending effects, a kneaded eraser can be easily shaped to suit your needs.
For artists, using a kneaded eraser is not just about erasing mistakes; it’s also about exploring different techniques and enhancing the overall quality of their artwork.
The soft and pliable texture of a kneaded eraser makes it perfect for creating delicate highlights and shadows, adding depth and dimension to your drawings.
With a kneaded eraser, you can achieve a wide range of tonal values and achieve the desired effects in your artwork.
Why Use a Kneaded Eraser? – Key Benefits:
Support us by using our links. We may earn a commission, but it won’t cost you extra. Win-win shopping
Whether you’re a beginner or an experienced artist, incorporating a kneaded eraser into your artistic toolkit can greatly enhance your creative process.
| Kneaded Eraser Benefits | Drawing | Artists |
|---|---|---|
| Leaves no residue or eraser bits behind | ✓ | ✓ |
| Offers precise erasing and highlighting control | ✓ | ✓ |
| Allows for subtle shading and blending effects | ✓ | ✓ |
| Enhances the quality and depth of artwork | ✓ | ✓ |
How to Use a Kneaded Eraser for Erasing
Using a kneaded eraser effectively is a skill that every artist should master. Whether you’re working with graphite, charcoal, or other mediums, the right technique can make all the difference in achieving clean and precise erasing.
Here are some easy steps to help you use a kneaded eraser for erasing:
- Mold the eraser into the desired shape: Start by kneading and stretching the eraser to make it pliable. Then, shape it into the form that suits your needs. You can create a pointed tip for detailed erasing or flatten it for broader strokes.
- Gently press the eraser onto the area you want to erase: Apply light pressure and make sure the eraser is in direct contact with the medium you want to remove. The flexibility of a kneaded eraser allows it to pick up the graphite or other medium effectively without damaging the paper.
- Use the “press and lift” method for darker marks: If you’re dealing with darker pencil marks, you may need to apply slightly more pressure. Press the eraser into the paper and then lift it off to remove the marks. This technique helps to lift off the medium without smudging or spreading it.
With these simple steps, you can achieve clean and precise erasing with a kneaded eraser.Here is a video on how Mont Marte Art uses kneaded erasers on his graphite and charcoal drawings.
You should experiment and practice to find the right amount of pressure, shape, and technique that work best for your artistic style and the medium you’re working with.
If you’re using a kneaded eraser for graphite or shading, you can take advantage of its versatility. By shaping the eraser into a fine point or a larger flat surface, you can create different tonal values in your artwork.
The softer texture of a kneaded eraser allows for smooth blending and shading, helping you achieve subtle transitions and realistic effects.
How to Use a Kneaded Eraser for Highlighting
When it comes to highlighting in your artwork, a kneaded eraser can be a valuable tool. With its pliable and moldable texture, it allows for precise control and delicate strokes.
Here are some tips on how to effectively use a kneaded eraser for highlighting:
- Pinch and swipe: To create lighter areas or highlights in your drawing, pinch the kneaded eraser and use it to gently swipe the graphite or charcoal using light strokes. This technique works best when you want to add subtle highlights to specific areas.
- Soft and gentle: It is important to apply gentle pressure when using a kneaded eraser for highlighting. Avoid pressing too hard, as it can bend or distort the eraser. Keep your strokes soft and delicate to achieve the desired effect.
- Shape and size: Depending on the area you want to highlight, you can shape the kneaded eraser accordingly. Pinch it to create a finer tip for precise highlighting, or flatten it to cover larger areas. Experiment with different shapes and sizes to achieve the desired results.
“Using a kneaded eraser for highlighting allows for subtle and controlled effects in your artwork.”
Here is a video on how Thanpay Pasulupeti uses kneaded erasers for highlights
Remember, it’s important to keep your kneaded eraser clean and moldable. If it starts to change shape or becomes too dirty, simply fold it into itself and knead it until it regains its original color and texture.
With proper care and technique, a kneaded eraser can be a versatile tool for highlighting and enhancing your artwork.
| Pros | Cons |
|---|---|
| Offers precise control | May leave traces of graphite or charcoal if not used carefully |
| Allows for subtle and controlled highlighting | Needs regular cleaning to maintain effectiveness |
| Moldable shape for different highlighting techniques | Can become less malleable over time and require replacement |
Tips and Techniques for Using a Kneaded Eraser
Using a kneaded eraser effectively requires some tips and techniques to make the most out of this versatile tool. Here are some strategies to enhance your erasing, blending, and smudging techniques:
- Experiment with pressure: Apply light pressure when erasing to avoid damage to the paper. Gradually increase pressure if needed, but avoid pressing too hard from the beginning.
- Create different shapes: The pliable nature of a kneaded eraser allows you to mold it into various shapes. Shape it into a point for detailed erasing or a flat disc for blending large areas. Get creative and test different shapes to achieve the desired effect.
- Combine with other tools: Don’t limit yourself to using the kneaded eraser alone. Experiment with using it in combination with other erasers or blending tools to achieve different textures and effects in your artwork.
- Practice on separate paper: Before using a kneaded eraser on your final artwork, practice different erasing and blending techniques on a separate piece of paper. This allows you to familiarize yourself with the capabilities of the kneaded eraser and develop your skills.
How to Clean and Maintain a Kneaded Eraser
Keeping your kneaded eraser clean is essential for maintaining its effectiveness in erasing and highlighting.
Over time, kneaded erasers can accumulate graphite, charcoal, and other particles, making them dirty and less efficient. Cleaning your kneaded eraser is a simple process that can be done regularly to ensure optimal performance.
Methods to Clean a Kneaded Eraser:
1. Stretch and Knead: Start by stretching and kneading your eraser. This will help loosen the accumulated debris and make it easier to remove. Keep stretching and kneading until the color of the eraser turns light grey, indicating that it is clean. The more you knead, the more effective the cleaning process.
2. Fold and Pinch: If your eraser becomes very dirty or loses its malleability, don’t worry. You can fold it into itself, creating a fresh surface. Pinch the eraser to a fine tip, and it will be ready to use again. This method helps remove any stubborn particles and refreshes the eraser’s performance.
“Regularly cleaning your kneaded eraser ensures that it remains pliable and capable of providing clean, precise erasing and highlighting.”
3. Replace if Necessary: Although kneaded erasers are generally long-lasting, they may eventually lose their effectiveness. If your eraser becomes too dirty to clean or starts to harden, it’s a sign that it may need to be replaced. Kneaded erasers are affordable and readily available in most art supply stores.
Benefits of a Clean Kneaded Eraser:
- Effective Erasing: A clean eraser will remove pencil marks and other mediums more efficiently, leaving minimal residue behind.
- Precise Highlighting: A clean eraser ensures that you can achieve lighter areas and highlights with greater accuracy and control in your artwork.
- Improved Moldability: Cleaning your eraser helps maintain its soft and pliable texture, allowing you to mold it into different shapes for specific erasing or highlighting needs.
Regularly cleaning your kneaded eraser ensures that it remains pliable and capable of providing clean, precise erasing and highlighting.
Here is a summary table of the benefits and appropriate methods of cleaning kneaded erasers.
| Benefits of Cleaning a Kneaded Eraser | Methods to Clean a Kneaded Eraser |
|---|---|
| Effective Erasing | Stretch and Knead |
| Precise Highlighting | Fold and Pinch |
| Improved Moldability | Replace if Necessary |
Choosing the Right Kneaded Eraser
When it comes to selecting a kneaded eraser, there are a few factors to consider.
The texture and softness of the eraser can greatly affect its performance. Different brands may have different textures, so it’s important to find one that feels comfortable to use and picks up graphite or other mediums easily.
I personally prefer softer kneaded erasers for achieving smoother blending and shading, but I know some artists who lean towards slightly firmer options for precision work.
It’s also important to me that the brand I choose holds its shape and is easy to mold.
As an artist, I highly recommend Prismacolor kneaded erasers. I love their softness and how effectively they lift off graphite, charcoal, and various other mediums.
They provide excellent control and are ideal for creating subtle shading and blending effects in artwork. Additionally, Prismacolor kneaded erasers are easy to mold into different shapes, allowing for precise erasing and highlighting.
Comparison of Kneaded Eraser Brands
| Brand | Texture | Softness | Moldability |
|---|---|---|---|
| Prismacolor | Smooth | Soft | Easy to mold |
| Faber-Castell | Textured | Firm | Moderate moldability |
| General Pencil | Smooth | Firm | Good moldability |
As shown in the comparison table, various brands have different textures and softness levels. The choice of kneaded eraser depends on personal preference and an artist’s specific needs.
I suggest trying out different brands to find the one that suits you best.
Making Your Own Kneaded Eraser
No kneaded eraser? No problem! You can craft your own with simple materials.
One DIY method involves rubbing a regular eraser on paper to create eraser residue, then mold it into a kneaded eraser shape. Here is a video tutorial on how to make your onw kneaded eraser using this method.
While it’s not as effective as store-bought ones, it’s handy in emergencies.
Another method involves mixing glue and graphite to form an eraser-like substance. Adjust the glue-to-graphite ratio for the right texture, mold it, and let it dry. It’s not as flexible as store-bought ones, but it’s useful for erasing and highlighting in your art.
Remember, while these DIY methods work in a pinch, having store-bought kneaded erasers in your art supplies is ideal for superior performance in your artwork.
Conclusion
Learning how to use a kneaded eraser can greatly enhance your artistic abilities and help you achieve the desired effects in your drawings and sketches.
These versatile tools can be used for erasing, highlighting, and shading, offering more control than traditional erasers. With their malleable texture, kneaded erasers can be easily molded into different shapes, allowing for precise erasing and subtle blending.
Whether you’re a beginner or an experienced artist, incorporating kneaded eraser techniques into your artistic process can bring your artwork to the next level. Practice using a kneaded eraser, explore different techniques, and have fun experimenting with this versatile tool